How to Make Perfect Pour Over Coffee at Home – Step by Step Guide
March 15, 2026 · 11 min read
Pour-over coffee looks intimidating — the slow circular pours, the scales, the timers, the vocabulary. But once you understand the four things that actually matter (ratio, grind, water, pour), brewing a great cup takes about 4 minutes and costs roughly $0.30.
This guide walks you through every step, from picking a bean to your first perfect brew. If you follow the recipe below, your first cup will be better than 90% of the coffee shops in your city.
What you'll need
Five pieces of gear. Nothing more:
| Item | Why | Budget pick |
|---|---|---|
| Dripper (V60 or Wave) | Holds the filter + grounds | Hario V60 02 — $25 |
| Paper filters | Retains fines and oils | Hario 02 tabbed — $5/100 |
| Burr grinder | Uniform particle size | Baratza Encore ESP — $199 |
| Gooseneck kettle | Controlled pour | Bonavita 1L Electric — $79 |
| Digital scale | Precise ratios | Timemore Black Mirror — $59 |
The complete pour-over kit.
Total cost for a complete kit: around $370, or $95 if you go all-budget with a hand grinder and stovetop kettle. Either way, you'll break even against Starbucks in under 3 months.
Step 1: Buy fresh beans
Coffee tastes best 5–21 days after roast. Look for a roast date printed on the bag — not a 'best by' date. Any bag without a roast date is old. Local roasters are ideal; if you're ordering online, subscription services like Trade or Blue Bottle ship 3–5 days after roasting.
Start with a medium-roast Colombian or Ethiopian. Both are forgiving and delicious. Skip dark 'French roast' style beans until you've learned the basics — they hide brewing mistakes but also hide the flavors that make pour-over worth the effort.
Step 2: The universal ratio
Use 1 gram of coffee for every 16 grams of water. That's the golden ratio. For a single cup, that means 20g of coffee + 320g of water. For a bigger mug, 25g + 400g.
Want stronger coffee? Try 1:15 (more coffee) instead of 1:16. Want weaker? 1:17. Don't go outside 1:14 or 1:18.
Try our interactive brew ratio calculatorShopStep 3: Grind size
For a V60 or Wave, you want a medium grind — like table salt. If your grinder has numbered settings, start in the middle and adjust from there:
Adjusting grind by taste
Coffee tastes sour and watery? Grind finer (smaller numbers). Coffee tastes bitter and dry? Grind coarser (larger numbers). Change grind size by 1–2 clicks at a time and re-brew. Grind size is the single most powerful lever you have.
Step 4: Water
Water is 98.5% of your coffee — treat it like an ingredient. Filtered tap water is fine for most of the world. If your tap water tastes like a swimming pool, use bottled spring water (Volvic and Crystal Geyser are cult favorites for coffee).
Heat water to 195°F–205°F (90°C–96°C). If you don't have a temperature-controlled kettle, boil the water and let it sit for 30 seconds before pouring.
Step 5: The pour
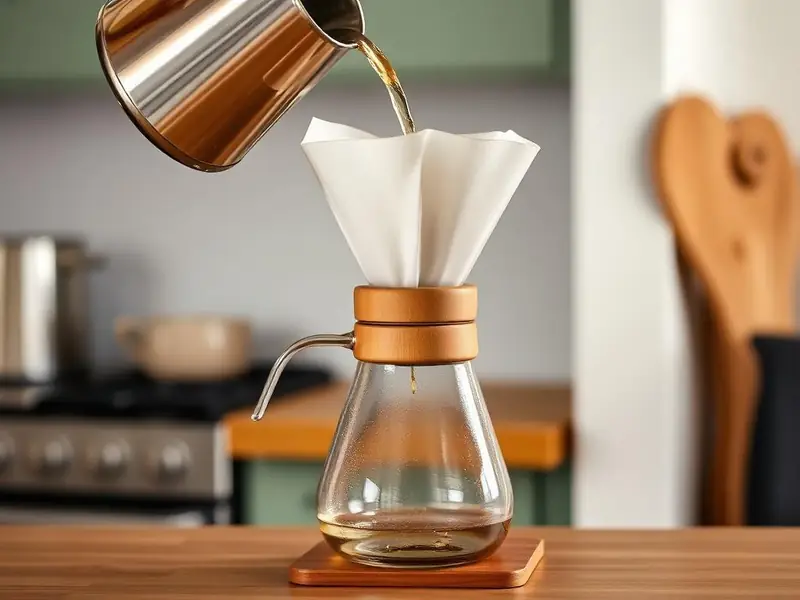
Here's the actual recipe. Assumes 20g of coffee, 320g of water total, and a V60 or Wave dripper:
0:00 — Bloom
Pour 40g of water (2× the coffee weight) directly onto the grounds. Give the dripper a gentle swirl to make sure all the grounds are wet. You'll see the coffee 'bloom' — puff up as it releases CO2. Fresh coffee blooms visibly; stale coffee doesn't.
0:30 — First main pour
Starting from the center, pour water in slow concentric circles outward, then back to the center. Aim to get to 160g total (about 5g/sec). Take about 20 seconds.
1:00 — Second main pour
Same technique. Pour from 160g to 240g. Take another 20 seconds.
1:30 — Final pour
Pour from 240g to 320g. Take 15 seconds. Total time from bloom to end of pour: about 2 minutes.
3:30–4:00 — Drawdown complete
Total brew time from bloom to last drip should be 3:30–4:00. If it took longer, grind coarser next time. If it finished faster, grind finer.
Step 6: Taste and adjust
Serve immediately — pour-over coffee changes character rapidly as it cools. Sip it black first, no matter how you normally drink it. Adjustments to make next brew:
| Taste | Likely cause | Fix |
|---|---|---|
| Sour, thin, weak | Under-extracted | Grind finer + slower pour |
| Bitter, dry, ashy | Over-extracted | Grind coarser + faster pour |
| Muddy, sludgy | Grind too fine | Grind coarser |
| Watery drainage too fast | Grind too coarse | Grind finer |
Troubleshooting your pour-over.
Common beginner mistakes
The top four things new brewers get wrong:
1. Using pre-ground coffee
Pre-ground coffee is stale within an hour of grinding. If you don't have a burr grinder, get one before you spend on anything else.
2. Not weighing
Scoop measurements are wildly imprecise — the same 'scoop' can be 15g or 22g depending on how you fill it. A scale takes 3 seconds and gives you the same cup every time.
3. Boiling water
Water at 212°F scalds the grounds and creates bitter, burnt flavors. Let boiling water rest 30 seconds before pouring.
4. Pouring too fast
A gooseneck kettle lets you control flow rate — use it. Aim for slow, deliberate circles, not a fast dump.
Complete Pour-Over Beginner Kit
V60 dripper + Baratza Encore ESP grinder + Bonavita kettle + scale + 100 filters.
Amazon · We may earn a commission
Where to go next
Once you've dialed in the basic recipe, start experimenting:
Try different beans (single-origin Ethiopian is a great next step). Adjust your ratio (try 1:15 for a stronger cup). Play with pour patterns (Kasuya's 4:6 method is a fantastic advanced recipe). Try a different dripper (see our V60 vs Wave breakdown).
Compare the two most popular pour-over brewersShopThe wrap-up
Pour-over coffee is a hobby you can spend a lifetime on, but the basics are genuinely simple: 1:16 ratio, medium grind, 200°F water, slow controlled pour, 3:30–4:00 brew time. Get those five things right and you'll be pulling café-quality coffee at home tomorrow.
Ready to upgrade your setup? Check our full reviews.ShopBuy it now
Shop the gear in this guide
Live Amazon listings for the products mentioned above. Prices checked September 2, 2026.


How to make pour over coffee
Brew a clean, sweet cup of pour over coffee in about four minutes using a 1:16 coffee-to-water ratio.
You need
- · 20 g freshly roasted coffee beans
- · 320 g filtered water at 96°C
- · Paper filter
Gear
- · Pour over dripper (V60 or Kalita Wave)
- · Gooseneck kettle
- · Digital scale
- · Burr grinder
- 1
Rinse the filter
Place the paper filter in the dripper and rinse with hot water to remove paper taste and preheat the brewer. Discard the rinse water.
- 2
Grind and dose
Grind 20 g of coffee to a medium consistency, similar to table salt, and add it to the filter. Level the bed and set the scale to zero.
- 3
Bloom
Pour 40–60 g of water at 96°C over the grounds and wait 45 seconds. The coffee will swell and release CO2.
- 4
Pour in stages
Pour in slow spirals to 180 g, pause 15 seconds, then pour to 320 g total. Keep the water level below the rim.
- 5
Drawdown and serve
Let the bed drain fully — a total brew time of 3:00 to 3:30 is the target. Swirl the cup and serve immediately.
- 6
Adjust to taste
Sour or thin? Grind finer. Bitter or harsh? Grind coarser or lower the water temperature by 2°C.
Frequently asked questions
Why do you bloom coffee?
The bloom releases trapped CO₂ from fresh beans. Without it, gas pushes water away from the grounds and causes uneven, under-extracted coffee. Use twice the coffee weight in water and wait 30–45 seconds.
How long should pour over take?
2:30 to 3:30 for a single-cup brew. If it drains faster, grind finer; if it stalls past four minutes, grind coarser.
Why does my pour over taste sour or bitter?
Sour means under-extraction — grind finer, use hotter water, or pour slower. Bitter means over-extraction — grind coarser, lower the temperature, or shorten the brew.
Tools & deeper dives
More on pour over, grinders, beginners and brewing basics.
Recommended gear
Gear used in this guides guide
Editor-tested picks. Buying through these Amazon links keeps HomeCoffeeBrew free.
Free download
Like this guide? Get one every Sunday.
Plus our free Brew Ratio Cheat Sheet — dial-in ratios for every method, delivered instantly as a PDF.